


Products
Solutions
Resources
Company

Guardsquare iXGuard is easy to set up with Xcode Cloud. In this blog I will show you an example of how Xcode Cloud can be set up to produce protected builds. You can easily adapt the example to suit your particular environment.
Required knowledge: you need to have general knowledge about Xcode Cloud. No special knowledge or expertise is required to get the integration up and running.
To produce a protected application build using Xcode Cloud, you will need to perform some additional steps compared to a standard build.
Let’s implement these steps in your Xcode Cloud build plan.
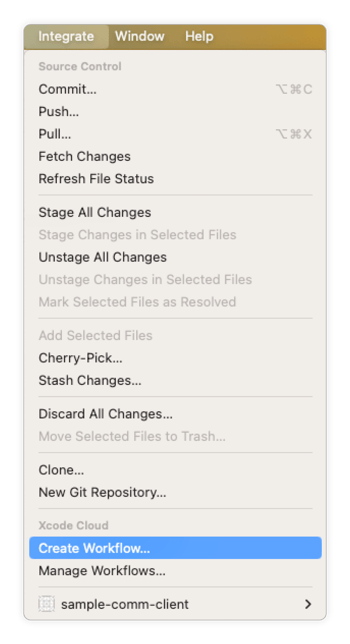
If you have not done so already, set up a new Xcode Cloud workflow by clicking Integrate → Create Workflow… in Xcode.
Specify the Archive action in the workflow specification:
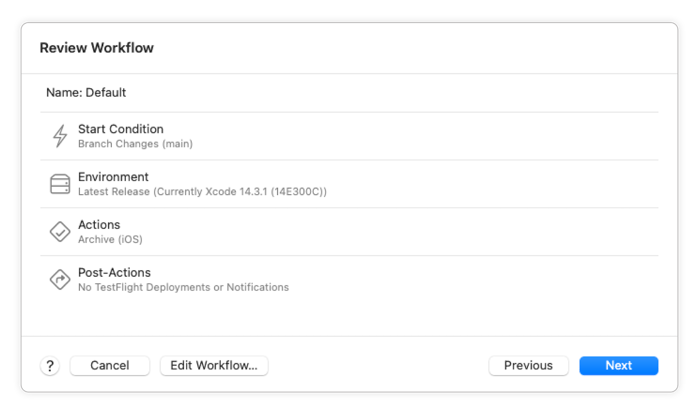
Finally, test your workflow and make sure it produces an unprotected application archive.
The next step is to download all required software to perform the protection. Here’s a general guidance on how to automatically download iXGuard to cloud CI systems. Let’s adapt it for Xcode Cloud.
First, you will need a keypair to access Guardsquare downloads. Use ssh-keygen to generate a new keypair and add it to the Guardsquare customer portal as described in the article above.
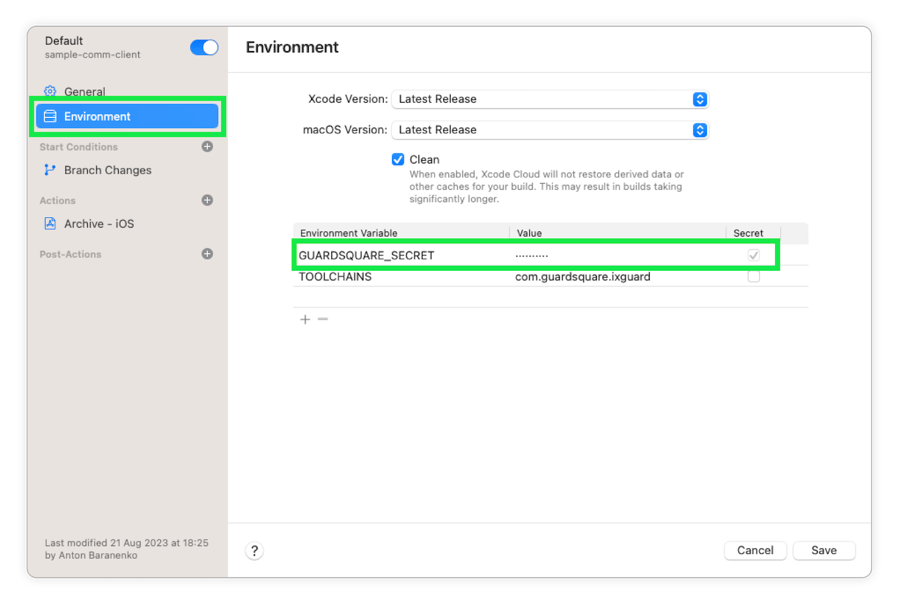
Let’s get the private key on the Xcode Cloud build machine. To do that, copy the contents of the private key file and assign it to an environment variable named GUARDSQUARE_SECRET. Use the Secret flag to prevent the variable from showing up in the GUI as well as being dumped into the output logs. In this article we will use a keypair that is not protected with a passphrase (specify an empty passphrase in the process of keypair generation).
Replace the new line characters with \n, so that your private key variable looks like:
-----BEGIN OPENSSH PRIVATE
KEY-----\n000firstline000\n111secondline111\n222thirdline222\n-----END
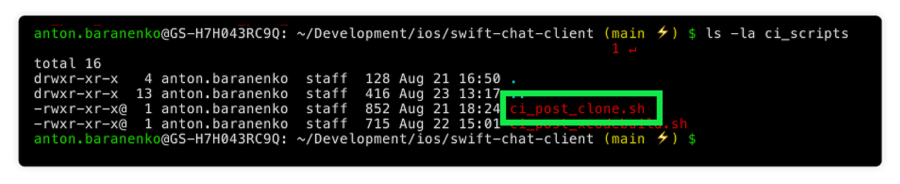
OPENSSH PRIVATE KEY-----To use this private key on the build machine, we will use Xcode Cloud lifecycle trigger scripts. In the root of your project create a directory named ci_scripts, and place a new shell executable file named ci_post_clone.sh.
Use the following contents for the ci_post_clone.sh script:
#!/bin/sh
echo Post-clone script - get iXGuard and install the toolchain
echo ---------------------------------------------------------

echo Getting Guardsquare CLI
curl -sS https://platform.guardsquare.com/cli/install.sh | sh

echo Saving Guardsquare access key
echo "$GUARDSQUARE_SECRET" >./guardsquare.pem
chmod 600 ./guardsquare.pem

echo Running SSH agent
eval "$(ssh-agent -s)"

echo Adding the Guardsquare access key to SSH
ssh-add ./guardsquare.pem

echo Downloading iXGuard
./guardsquare --ssh-agent download ixguard -o ixguard.pkg

echo Downloading licenses
./guardsquare --ssh-agent download licenses

echo Extracting iXGuard
rm -rf ./ixguard-package
pkgutil --expand-full ./ixguard.pkg ./ixguard-package

echo Installing toolchain
./ixguard-package/ixguard.pkg/Payload/scripts/create_toolchain -p ./ixguard-package/ixguard.pkg/Payload
This script will use the private key from the environment variable you’ve just defined to download iXGuard and all applicable licenses and install the iXGuard toolchain.
Do not forget to chmod +x the script and add it to Git.
To make a bitcode-enabled build, it is sufficient to define the TOOLCHAINS environment variable as below.

To protect the application in the Xcode Cloud CI flow, you will need to run a few commands at the post-archive step.
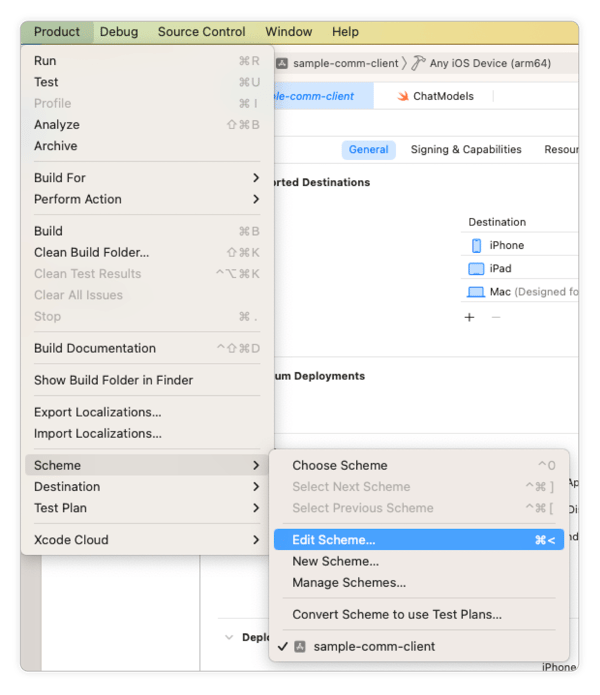
To implement these commands, go to Product → Schemes → Edit Scheme:
Add a Run Script post-action to the Archive step: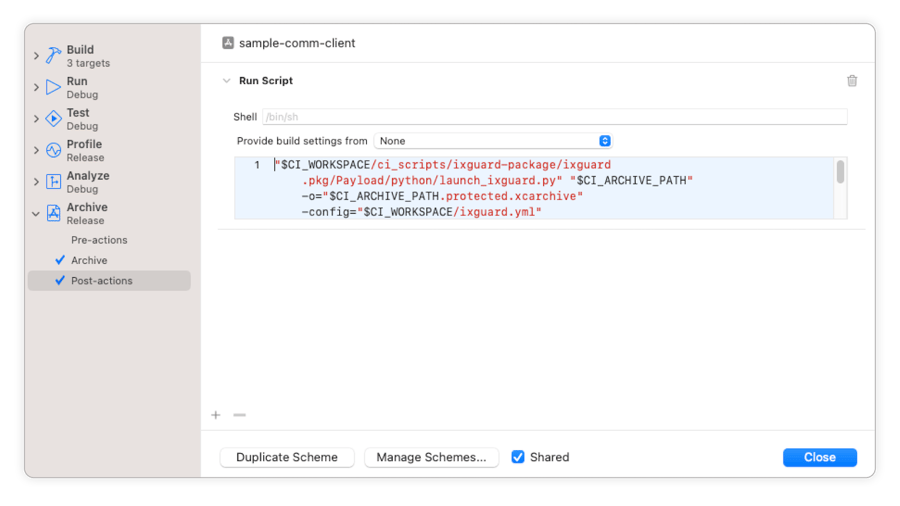
Add the following line to your Archive post-action script:
"$CI_PRIMARY_REPOSITORY_PATH/ci_scripts/ixguard-package/ixguard.pkg/Payload/python/launch_ixguard.py" "$CI_ARCHIVE_PATH" -o="$CI_ARCHIVE_PATH.protected.xcarchive" -config="$CI_PRIMARY_REPOSITORY_PATH/ixguard.yml"This command relies on iXGuard configuration to be in the root directory of your project and be named ixguard.yml.
Note
Your iXGuard configuration has to be checked into the source code repository. Therefore, only set Xcode Cloud build on private, and never on public repositories.
Pro tip:
If you want to run this line only on the CI server, you can use the CI environment variable that is automatically defined by Xcode Cloud.
And the last step of this example workflow is to export the protected application artifacts. Since Xcode Cloud requires a certain archive name in order for that archive to be picked up by the export tasks, I am going to rename the files so that the protected archive substitutes the unprotected one.
Let’s add two new commands to the post-archive action:
mv "$CI_ARCHIVE_PATH" "$CI_ARCHIVE_PATH.unprotected.xcarchive"
mv "$CI_ARCHIVE_PATH.protected.xcarchive" "$CI_ARCHIVE_PATH"
The complete post-archive script would look like this:
"$CI_PRIMARY_REPOSITORY_PATH/ci_scripts/ixguard-package/ixguard.pkg/Payload/python/launch_ixguard.py" "$CI_ARCHIVE_PATH" -o="$CI_ARCHIVE_PATH.protected.xcarchive" -config="$CI_PRIMARY_REPOSITORY_PATH/ixguard.yml"
mv "$CI_ARCHIVE_PATH" "$CI_ARCHIVE_PATH.unprotected.xcarchive"
mv "$CI_ARCHIVE_PATH.protected.xcarchive" "$CI_ARCHIVE_PATH"The output of the Archive Post Action script is not logged into the Xcode Cloud build log by default. In order to print the output of certain commands you execute as part of your Archive Post Action script, you can use the following strategy:
1. In your script, you can add a command that will create a file used to populate with the outputs of certain commands. This file will be put in the CI_WORKSPACE_PATH directory (see second command in the script above).
# Create a file used for logging

touch $CI_WORKSPACE_PATH/post-archive.log
2. For each command you would like to see the output of, you can add:
YOUR COMMAND | tee -a "$CI_WORKSPACE_PATH/post-archive.log"3. In the root of your project you previously created a directory named ci_scripts. Place a new shell executable file named ci_post_xcodebuild.sh in the ci_scripts directory.
4. Populate the ci_post_xcodebuild.sh script with a command that will print out the content of the post-archive.log file:
cat $CI_WORKSPACE_PATH/post-archive.logMaking iXGuard work in the Xcode Cloud environment boils down to using Xcode Cloud lifecycle hooks to run Guardsquare tools at the right time.
You can easily modify this process to incorporate your own logic, such as application security scanning, email notifications, and more.