


Products
Solutions
Resources
Company
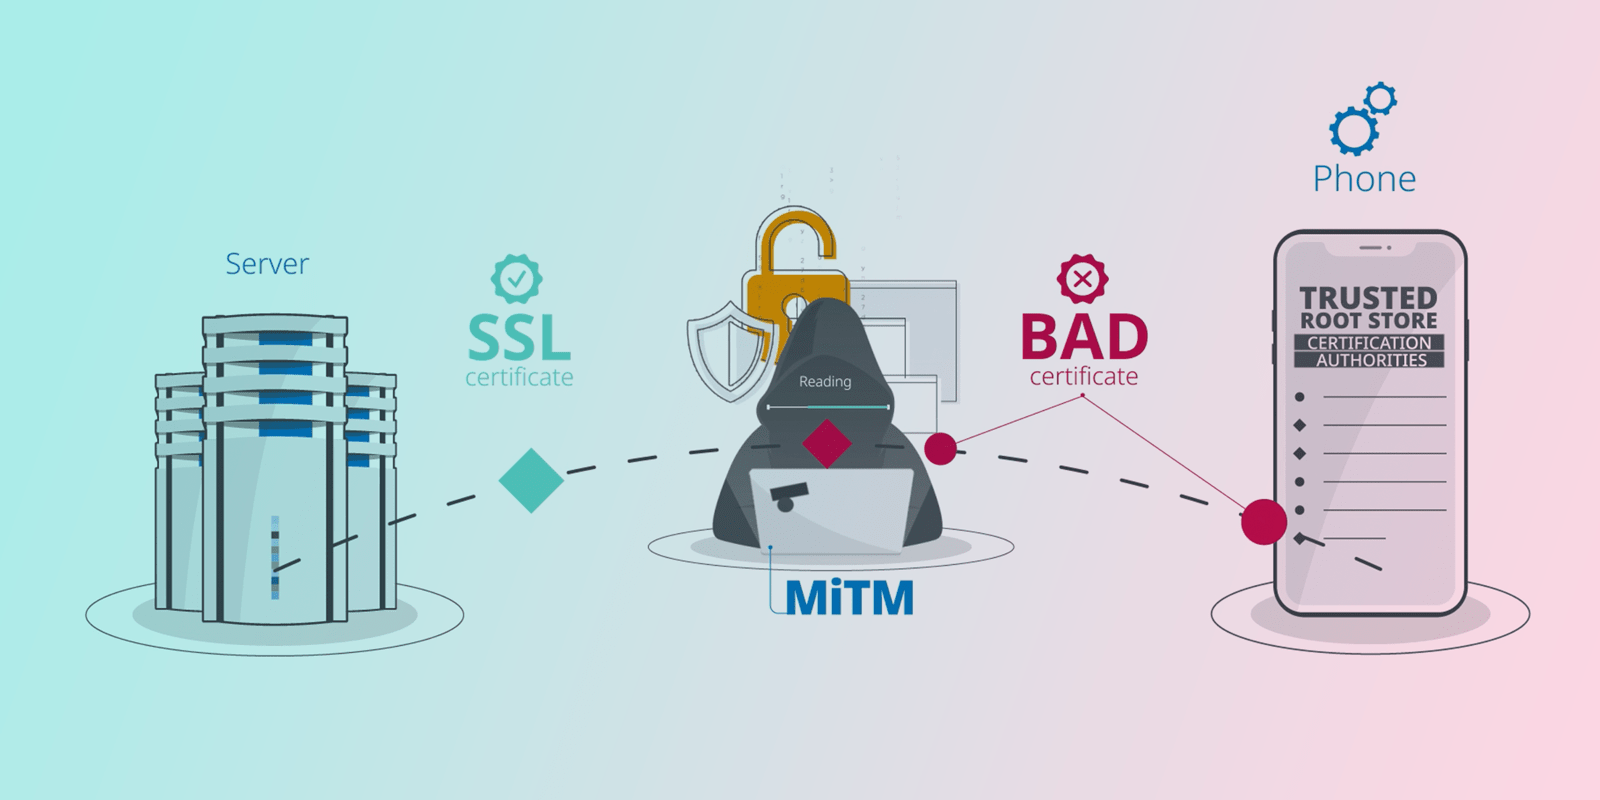
One of the first things an attacker will do when reverse engineering a mobile application is to bypass the SSL/TLS (Secure Sockets Layer/Transport Layer Security) protection to gain a better insight in the application’s functioning and the way it communicates with its server. In this blog, we explain which techniques are used to bypass SSL pinning in iOS and which countermeasures can be taken.
When mobile apps communicate with a server, they typically use SSL to protect the transmitted data against eavesdropping and tampering. By default, SSL implementations used in apps trust any server with certificate trusted by the operating system’s trust store. This store is a list of certificate authorities that is shipped with the operating system.

With SSL pinning iOS, however, the application is configured to reject all but one or a few predefined certificates. Whenever the application connects to a server, it compares the server certificate with the pinned certificate(s). If and only if they match, the server is trusted and the SSL connection is established.

Setting up and maintaining SSL sessions is usually delegated to a system library. This means that the application that tries to establish a connection does not determine which certificates to trust and which not. The application relies entirely on the certificates that are included in the operating system’s trust store.
A researcher who generates a self-signed certificate and includes it in the operating system's trust store can set up a man-in-the-middle attack against any app that uses SSL. This would allow him to read and manipulate every single SSL session. The attacker could use this ability to reverse engineer the protocol the app uses or to extract API keys from the requests.
Attackers can also compromise SSL sessions by tricking the user into installing a trusted CA through a malicious web page. Or the root CAs trusted by the device can get compromised and be used to generate certificates.

Narrowing the set of trusted certificates through the implementation of iOS SSL pinning effectively protects applications from the described remote attacks. It also prevents reverse engineers from adding a custom root CA to the store of their own device to analyze the functionality of the application and the way it communicates with the server.
iOS SSL pinning is implemented by storing additional information inside the app to identify the server and ensure that no man-in-the-middle attack is being carried out.
Either the actual server certificate itself or the public key of the server is pinned. You can opt to store the exact data or a hash of that data. This can be a file hash of the certificate file or a hash of the public key string.
The choice between pinning the certificate or the public key has a few implications for security and maintenance of the application. This lies outside the scope of this blog, but more information can be found here.
The data required for SSL pinning iOS can be embedded in the application in two ways: in an asset file or as a string in the actual code of the app.
If you pin the certificate file, the certificate is usually embedded as an asset file. Each time an SSL connection is made, the received server certificate is compared to the known certificate(s) file(s). Only if the files match exactly, the connection is trusted.
When pinning the public key of the server, the key can be embedded as a string in the application code or it can be stored in an asset file. Whenever an SSL connection is made, the public key is extracted from the received server certificate and compared to the stored string. If the strings match exactly, the connection is trusted.
The following libraries are popular options for implementing SSL pinning in Swift and Objective-C iOS applications.
| Name | Pinning implementation | Language | Type | Link |
| NSURLSession | Certificate file, public key | Objective-C | Apple networking library | Link |
| AlamoFire | Certificate file, public key | Swift | Networking library | Link |
| AFNetworking | Certificate file, public key | Objective-C | Networking library | Link |
| TrustKit | Public key | Objective-C | SSL pinning | Link |
NSURLSession is Apple’s API for facilitating network communication. It is a low-level framework, so implementing iOS SSL pinning with it is hard and requires a lot of manual checks.
TrustKit, AlamoFire and AFNetworking are widely used frameworks built on top of NSURLSession. Both AFNetworking and AlamoFire are full-fledged networking libraries that support SSL pinning checks as part of their API. TrustKit is a small framework that only implements SSL pinning checks.
AFNetworking for Objective-C apps or AlamoFire for Swift apps are good choices when you are looking for a complete network library. If you only need SSL pinning, TrustKit is a good option.
iOS SSL pinning bypass can be achieved in one of two ways:
In the next sections, we will demonstrate both methods using a sample application and provide some suggestions on how to prevent tampering attempts.
We will show how to bypass TrustKit SSL pinning in the TrustKit demo application running on a jailbroken iPhone. We will be using the following tools.
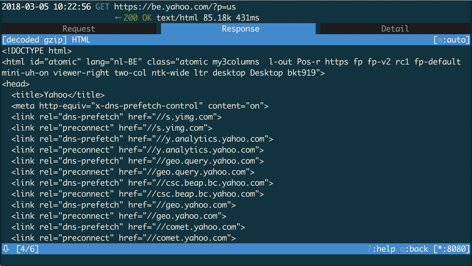
The TrustKit demo application has minimal functionality. It only tries to connect to https://www.yahoo.com/ using an invalid pinned hash for that domain.
let trustKitConfig: [String: Any] = [
           kTSKSwizzleNetworkDelegates: false,
           kTSKPinnedDomains: [
               "yahoo.com": [
                   kTSKEnforcePinning: true,
                   kTSKIncludeSubdomains: true,
                   kTSKPublicKeyAlgorithms: [kTSKAlgorithmRsa2048],

                   // Invalid pins to demonstrate a pinning failure
                   kTSKPublicKeyHashes: [
                        "AAAAAAAAAAAAAAAAAAAAAAAAAAAAAAAAAAAAAAAAAAA=",
                        "BBBBBBBBBBBBBBBBBBBBBBBBBBBBBBBBBBBBBBBBBBB="
                   ],
                   kTSKReportUris:["https://overmind.datatheorem.com/trustkit/report"],
               ],
…
Note that even if the supplied hashes would be valid for the yahoo.com domain, SSL pinning validation should still fail as long as we’re using a man-in-the-middle proxy.
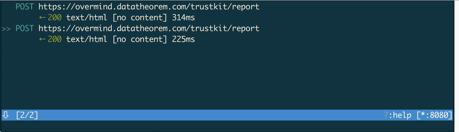
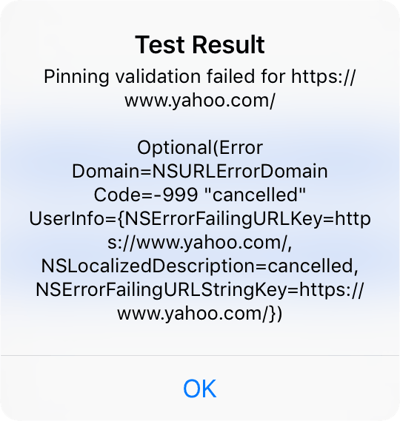
When connecting to yahoo.com, mitmproxy shows us that the domain is not actually visited. Only the report of the SSL pinning verification is sent to the configured servers. The device itself displays a message that the pinning validation failed. All of this is expected behavior since SSL pinning is enabled.
We will explain how to bypass the iOS SSL pinning check with Frida. Before we can try to bypass it, we need to find out where in the code the actual SSL pinning check is performed.
Finding the check
Since TrustKit is open source, we can easily find out where the actual certificate validation logic takes place: -[TSKPinningValidator evaluateTrust:forHostname:]. In cases in which the source code is not available, a good look at the API of the SSL pinning library will usually reveal where the actual validation work is done.
The signature of evaluateTrust:forHostname: contains a lot of information about the method.
- (TSKTrustDecision)evaluateTrust:(SecTrustRef _Nonnull)serverTrust forHostname:(NSString * _Nonnull)serverHostnameThe method is passed 2 arguments, including the hostname of the server that is being contacted, and it returns a TSKTrustDecision.
The TSKTrustDecision type is a simple enum.
/** Possible return values when verifying a server's identity against a set of pins. */
typedef NS_ENUM(NSInteger, TSKTrustEvaluationResult)
{
    TSKTrustEvaluationSuccess,
    TSKTrustEvaluationFailedNoMatchingPin,
    TSKTrustEvaluationFailedInvalidCertificateChain,
    TSKTrustEvaluationErrorInvalidParameters,
    TSKTrustEvaluationFailedUserDefinedTrustAnchor,
    TSKTrustEvaluationErrorCouldNotGenerateSpkiHash,
};
The source code documents each of these fields, but it is clear that the most interesting value is TSKTrustEvaluationSuccess.
Bypassing the check
To bypass the TrustKit SSL pinning check, we will hook the -[TSKPinningValidator evaluateTrust:forHostname:] method using Frida and ensure it always returns the required value. First, we create a Frida instrumentation script and save it as disable_trustkit.js.
var evalTrust = ObjC.classes.TSKPinningValidator["- evaluateTrust:forHostname:"];
Interceptor.attach(evalTrust.implementation, {
    onLeave: function(retval) {
        console.log("Current return value: " + retval);
        retval.replace(0);
        console.log("Return value replaced with (TSKTrustDecision) \
                                TSKTrustDecisionShouldAllowConnection");
    }
});
This script will attach Frida to the evaluateTrust:forHostname: instance method in the TSKPinningValidator interface and execute the given code each time this method returns. The code replaces the return value with 0 (TSKTrustEvaluationSuccess) regardless of its previous value and logs this.
We launch Frida and attach to the TrustKitDemo process on our device, executing our script: frida -U -l disable_trustkit.js -n TrustKitDemo-Swift.
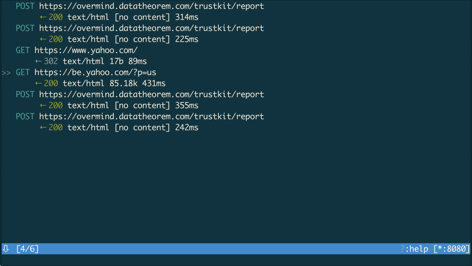
If we try to load https://www.yahoo.com now, we see in mitmproxy suite that the URL was loaded successfully.
The device also shows that the pin validation succeeded.

Locally, Frida returns the following output showing that the hook did what we expected.
 [iPhone::TrustKitDemo-Swift]->
Current return value: 0x1
Return value replaced with (TSKTrustDecision) TSKTrustDecisionShouldAllowConnection

Current return value: 0x1
Return value replaced with (TSKTrustDecision) TSKTrustDecisionShouldAllowConnection
We have now successfully bypassed TrustKit SSL pinning and are able to view and modify all web requests.
Of course, this is only a very basic example of bypassing a single SSL pinning implementation through changing a return value.
Off-the-shelf tools
Bypassing SSL can be accomplished even easier using existing tweaks for jailbroken devices. SSL Kill Switch 2, for example, patches the low-level iOS TLS stack, disabling all SSL pinning implementations that use it. The Objection SSL Pinning disabler for Frida implements the low-level checks of SSL Kill Switch 2 and extends these with a few framework-specific hooks.
The following table outlines the methods that can be hooked for some SSL pinning frameworks.
| libcoretls_cfhelpers.dylib | tls_helper_create_peer_trust |
| NSURLSession | -[* URLSession:didReceiveChallenge:completionHandler:] |
| NSURLConnection | -[* connection:willSendRequestForAuthenticationChallenge:] |
| AFNetworking | -[AFSecurityPolicy setSSLPinningMode:] |
Mitigation: detect hooking
Before verifying the SSL pin, we can verify the integrity of the above functions. As an example, we’ll use SSL Kill Switch 2 which is built on top of the ‘Cydia Substrate’ framework, a commonly used library for writing runtime hooks. Hooking in this framework is done through the MSHookFunction API.
The method explained here is a proof-of-concept. Don’t use this hook detection code in production software. It is a very basic and only detects a specific kind of hook on ARM64. Using this check without any additional obfuscation would also make it very easy to remove.
A common way of hooking native functions is to overwrite their first couple of instructions with a ‘trampoline’, a set of instructions responsible for diverting control flow to a new code fragment to replace or augment the original behavior. Using lldb, we can see exactly what this ‘trampoline’ looks like.
First 10 instructions of the unhooked function:
(llb) dis -n tls_helper_create_peer_trust
libcoretls_cfhelpers.dylib`tls_helper_create_peer_trust:
    0x1a8c13514 <+0>:   stp    x26, x25, [sp, #-0x50]!
    0x1a8c13518 <+4>:   stp    x24, x23, [sp, #0x10]
    0x1a8c1351c <+8>:   stp    x22, x21, [sp, #0x20]
    0x1a8c13520 <+12>:  stp    x20, x19, [sp, #0x30]
    0x1a8c13524 <+16>:  stp    x29, x30, [sp, #0x40]
    0x1a8c13528 <+20>:  add    x29, sp, #0x40            ; =0x40
    0x1a8c1352c <+24>:  sub    sp, sp, #0x20             ; =0x20
    0x1a8c13530 <+28>:  mov    x19, x2
    0x1a8c13534 <+32>:  mov    x24, x1
    0x1a8c13538 <+36>:  mov    x21, x0
First 10 instructions of the hooked function:
(llb) dis -n tls_helper_create_peer_trust
libcoretls_cfhelpers.dylib`tls_helper_create_peer_trust:
    0x1a8c13514 <+0>:   ldr    x16, #0x8                 ; <+8>
    0x1a8c13518 <+4>:   br     x16
    0x1a8c1351c <+8>:   .long  0x00267c2c                ; unknown opcode
    0x1a8c13520 <+12>:  .long  0x00000001                ; unknown opcode
    0x1a8c13524 <+16>:  stp    x29, x30, [sp, #0x40]
    0x1a8c13528 <+20>:  add    x29, sp, #0x40            ; =0x40
    0x1a8c1352c <+24>:  sub    sp, sp, #0x20             ; =0x20
    0x1a8c13530 <+28>:  mov    x19, x2
    0x1a8c13534 <+32>:  mov    x24, x1
    0x1a8c13538 <+36>:  mov    x21, x0
In the hooked function, the first 16 bytes form the trampoline. The address 0x00000001002ebc2c is loaded into register x16 after which it jumps to that address (BR X16). This address refers to SSLKillSwitch2.dylib`replaced_tls_helper_create_peer_trust, which is SSL Kill Switch 2’s replaced implementation
(lldb) dis -a 0x00000001002ebc2c
SSLKillSwitch2.dylib`replaced_tls_helper_create_peer_trust:
    0x1002ebc2c <+0>:  sub    sp, sp, #0x20             ; =0x20
    0x1002ebc30 <+4>:  mov    w8, #0x0
    0x1002ebc34 <+8>:  str    x0, [sp, #0x18]
    0x1002ebc38 <+12>: strb   w1, [sp, #0x17]
    0x1002ebc3c <+16>: str    x2, [sp, #0x8]
    0x1002ebc40 <+20>: mov    x0, x8
    0x1002ebc44 <+24>: add    sp, sp, #0x20             ; =0x20
If a function’s implementation is known in advance, the first few bytes of the found function can be compared to the known bytes, effectively ‘pinning’ the function implementation. For Cydia Substrate, we see the function being patched with an unconditional branch to a register (BR Xn), so we can check if we find such an instruction in the first few bytes. If a branch instruction is found, we assume the function is hooked, otherwise we assume it is valid. For demonstration purposes, this simplified assumption will suffice.
To find a good mask to detect branch instructions, we had a look at the opcode tables in the GNU Binutils source code.
The aarch64_opcode_table table contains ARM64 opcodes and a mask for the opcode.
struct aarch64_opcode aarch64_opcode_table[] = {
  ...
  /* Unconditional branch (register). */
  {"br", 0xd61f0000, 0xfffffc1f, branch_reg, 0, CORE, OP1 (Rn), QL_I1X, 0},
  {"blr", 0xd63f0000, 0xfffffc1f, branch_reg, 0, CORE, OP1 (Rn), QL_I1X, 0},
  {"ret", 0xd65f0000, 0xfffffc1f, branch_reg, 0, CORE, OP1 (Rn), QL_I1X, F_OPD0_OPT | F_DEFAULT (30)},
  ...
The entries are aarch64_opcode structs.
From the opcode mask (0xfffffc1f) and the instruction representations, we can deduce that the opcode for unconditional branch to register value instructions must match 0xD61F0000.
// Only valid for ARM64.
int isSSLHooked() {
    void* (*createTrustFunc)() = dlsym(RTLD_DEFAULT, "tls_helper_create_peer_trust");
    if(createTrustFunc == 0x0){
        // Unable to find symbol, assume function is hooked.
        return 1;
    }

    unsigned int * createTrustFuncAddr = (unsigned int *) createTrustFunc;

    // Verify if one of first three instructions is an unconditional branch
    // to register (BR Xn), unconditional branch with link to register
    // (BLR Xn), return (RET).
    for(int i = 0; i < 3; i++){
        int opCode = createTrustFuncAddr[i] & 0xfffffc1f;
        if(opCode == 0xD61F0000){
            // Instruction found, function is hooked.
            return 1;
        }
    }

    // Function is not hooked through a trampoline.
    return 0;
}
We can call this function before an SSL pinning check is done, for example in loadUrl, and only start an SSL session if the checked function is not hooked.
Mitigation: name obfucation
With iOS SLL pinning bypass, the attacker first needs to find out which method he has to hook . By using a tool to obfuscate Swift and Objective-C metadata in their iOS app, developers can make it much more difficult for the attacker to determine which methods to hook.
Name obfuscation will also throw off all automated tools that look for a known method name. An obfuscator can rename methods in a different way in each single build of the application, forcing an attacker to search the actual name in each new version.
It is important to note that name obfuscation only protects against tools that bypass SSL checks implemented in the code of applications or in libraries included in the application. Tools that work by hooking system frameworks won’t be deterred by it.
The other way to bypass SSL pinning is to replace the pinned data inside the application. If we are able to replace the original pinned certificate file or public key string with one that belongs to our man-in-the-middle server, we would be pinning our own server.
Replacing an embedded certificate file can be as easy as swapping a file in the IPA package.
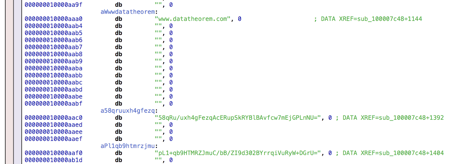
In implementations that pin a hash of the server public key, we can replace the string with the hash of our own public key. The screenshot below shows the TrustKit demo application loaded into Hopper. Hopper allows us to replace strings in the MachO file and reassemble it into a valid executable.
Once the file or the string is replaced, the directory needs to be resigned and zipped as an IPA. This lies outside the scope of this blog, but more information can be found here.
Mitigation: string encryption
When pinning certificates with a list of hard-coded public key hashes, it is a good idea to encrypt the values. This doesn’t protect against hooking, but makes it much more difficult to replace the original hashes with those of an attacker certificate since these would have to be correctly encrypted as well.
Mitigation: control flow obfuscation
A reverse engineer can analyze the control flow of the application to find the location where the actual hash is verified. If he succeeds in finding it, he can see which strings are used and find out the location of the hash string in the binary. By obfuscating the control flow of the application, the app developer makes it much more difficult to perform a manual analysis of the code.

Click here to learn more about how Guardsquare’s iXGuard protects iOS apps.